
Introduction: When you write code, you want to make sure it works correctly. But testing your app manually by clicking buttons on your screen takes a lot of time. If you change a function later, you have to test everything again. To solve this, developers write Unit Tests—simple, automated scripts that verify your code's calculations and logic in less than a second.
The Analogy: The Calculator Quality Inspector
Imagine you run a factory that makes physical calculators. You do not package and ship them to customers hoping they work. You hire a **Quality Inspector**.
The inspector follows three simple rules:
- 1. Arrange: Grab a brand new calculator and turn it on.
- 2. Act: Press the buttons
2 + 3 =. - 3. Assert: Look at the screen and verify if it displays exactly
5. If yes, the calculator passes. If it shows 6, it is rejected.
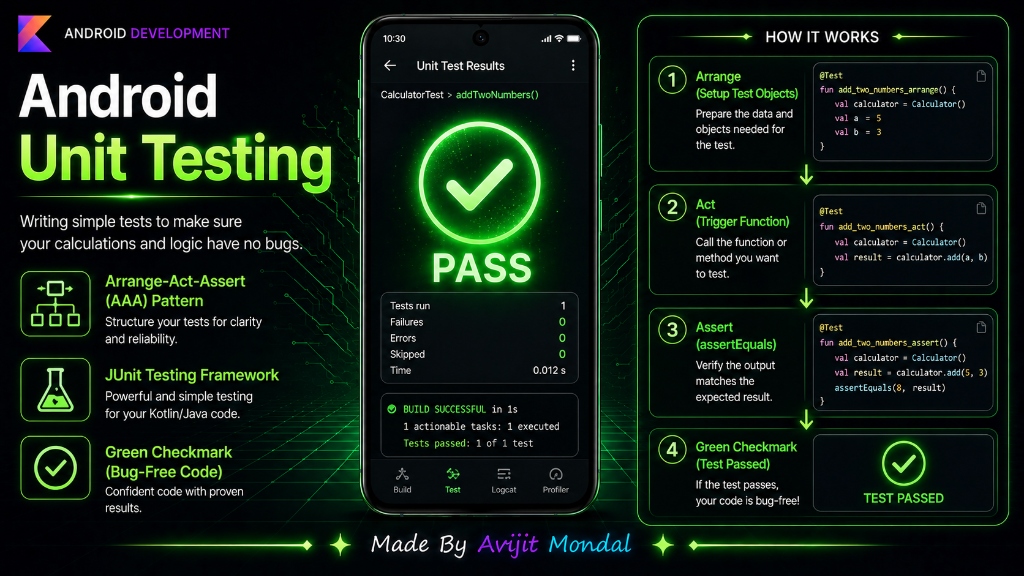
In coding, a Unit Test is that inspector. It runs a single function (a 'unit' of code) with specific inputs and checks if the output matches what you expect. This is called the AAA (Arrange, Act, Assert) pattern.
How to Write a Unit Test in Kotlin
Android projects use a built-in library called JUnit. Let's see how to write a simple test for a math helper class.
Step 1: Write the Class to be Tested
Suppose we have a simple TaxCalculator class that calculates tax based on a price:
class TaxCalculator {
    fun calculateTax(price: Double): Double {
        return price * 0.15 // 15% tax rate
    }
}
Step 2: Write the Test Code
Inside your project's test/ folder, create a test class. We mark test functions with the @Test annotation, and use assertEquals() to check the results:
import org.junit.Assert.assertEquals
import org.junit.Test

class TaxCalculatorTest {

    @Test
    fun testTaxCalculation_isCorrect() {
        // 1. ARRANGE: Set up the calculator
        val calculator = TaxCalculator()

        // 2. ACT: Calculate tax for $100
        val tax = calculator.calculateTax(100.0)

        // 3. ASSERT: Verify if tax is exactly $15.0
        // Syntax: assertEquals(expectedValue, actualValue, deltaAllowed)
        assertEquals(15.0, tax, 0.001)
    }
}Types of Android Tests
Android has two main testing folders. Learn the difference in this comparison table:
| Test Category | Runs On | Execution Speed | Purpose |
|---|---|---|---|
| Unit Tests (test/ folder) | Your computer's CPU (JVM) | 🚀 Instant (under 1 second) | Testing math logic, viewmodel states, network data mapping. |
| Instrumented UI Tests (androidTest/ folder) | A real Android phone or simulator | 🐢 Slow (takes minutes to start) | Testing UI flows, database writes, clicking buttons, screen swipes. |
Summary
Unit testing is writing small, automated scripts to verify that single functions output correct results. By following the Arrange-Act-Assert structure and using JUnit's assertEquals(), you can run thousands of tests instantly on your computer without running a phone simulator. Adopt testing to code with confidence and ship bug-free apps!